Adventures in Baking: Pumpkin Pie
Well, folks, you voted and I delivered: the recipe I’m reviewing for this month is Thanksgiving Pumpkin Pie! Pies are a staple of this November holiday; however, they can be a bit tricky to make since they require the creation of both a filling and a pie crust. For this review, I used the Pumpkin Pie recipe from King Arthur Flour, found here, and their Classic Single Pie Crust recipe, found here.
This is a two-day recipe, since the filling needs to be refrigerated overnight for the best flavor. First, I combined the dry ingredients of the filling in my mixing bowl: the sugars, salt, various spices, and a little flour. Next, I took out a separate bowl and mixed by hand the 3 eggs, the pumpkin, and the half-and-half (the recipe says to use a “light cream”, or a mixture of both milk and cream). Finally, I poured the wet ingredients into the mixing bowl and combined the wet and dry ingredients into the finished filling. I transferred the mixture from my mixing bowl into another bowl, covered the bowl in tin foil, and refrigerated the filling overnight.
The next day, I made my pie crust early in the morning so that it would have time to refrigerate for a few hours. First, I mixed the flour and the salt together in my mixing bowl. Next, I added the shortening (I used the trusty Crisco that is a staple in my household) and stirred until the crust was crumbly throughout. After that, I warmed up my butter and added it to the crust, beating it with my mixer until it was unevenly incorporated (there should be large chunks of butter still). Finally, I added the water and mixed until it was combined.
Next, I dumped the dough out onto a large sheet of parchment paper (thick layers of plastic wrap can work too) and rubbed some water into the dry spots (you can spritz the water if you have a spray bottle you trust). Then, I folded the dough over on itself a few times, shaped it into a disc, wrapped it in plastic wrap, and placed the dough in the refrigerator.
When I came back to the dough a few hours later, I let it soften for 10-15 minutes before rolling it out into a 12” circle. Be sure to spread a thin layer of flour on either the dough or the rolling pin (or both) before rolling to keep the dough from sticking to the rolling pin. After the dough was in the proper shape, I picked up the parchment paper and flipped it into my 9” pie tin. This strategy did not work well, as I covered my pants in pie crumbs, and as such I do not recommend it; however, it did the job and the dough was into the pan! I crimped, or pinched, the edges so that they stood up at an angle, making the edge of the pie more uniform. Finally, the pie crust was done, and it was ready to be baked!
I took my filling out of the refrigerator, swirled it around a bit to incorporate some separated cream, and poured it into the pie pan. I recommend placing the pie tin onto a baking sheet first before pouring the filling into the pan so that you do not drip pie filling onto your counters as you move your pie pan (please learn from my mistake). Finally, I placed the pie into the oven at the wrong temperature, and hence had to cook it for an extra ten minutes over the baking time.
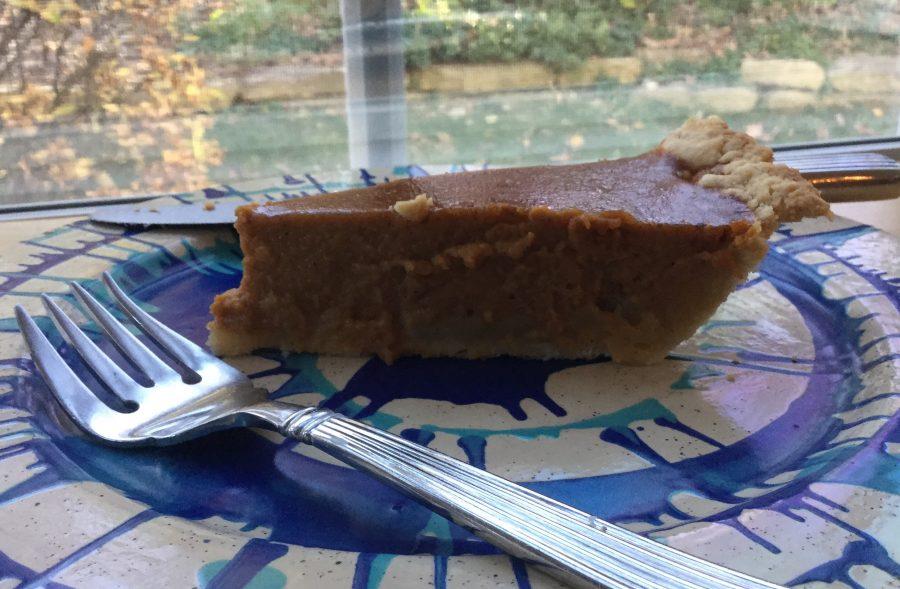
Despite the few mishaps, the pie came out looking reasonably good, with the edges slightly burnt on top but with a wobbly center. I left the pie out to cool for 20 minutes before trying a piece. Thankfully, I took the pie out at the right time – the filling held together perfectly and the pie tasted delicious! This recipe was fun and pretty easy to make, so I definitely recommend it for your Thanksgiving dessert!


Ellie is The Glen Bard's Editor-in-Chief and a senior at Glenbard West. This year is her third on the Editorial Board. She plays field hockey and chess,...